Welcome to Learn With Pari!
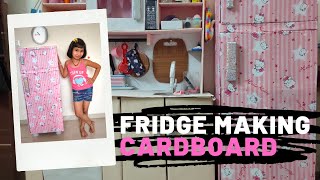
At Learn With Pari, we love turning ordinary household items into extraordinary learning experiences. Today’s project is perfect for little chefs and pretend-play lovers—Let’s make a refrigerator at home using cardboard!
A cardboard fridge is a fun addition to any DIY kitchen set and helps spark creativity, hands-on learning, and imaginative play. Plus, it’s easy, eco-friendly, and budget-friendly!
🧰 Materials You’ll Need
You probably have most of these items at home already!
- 📦 Large cardboard box (tall enough to be fridge-sized)
- ✂️ Scissors or craft knife (adult supervision required)
- 📏 Ruler or scale
- 🎨 Paint, markers, or colored paper (for decorating)
- 🖇️ Glue, tape, or hot glue gun (with help from an adult)
- 🧲 Magnets or Velcro (for door closure, optional)
- 🚪 Small cardboard pieces (for shelves and freezer door)
🏗️ Step-by-Step: How to Make a Cardboard Refrigerator
Here’s how you and your little one can create a fridge together!
✅ Step 1: Choose Your Box
Pick a tall cardboard box that can stand upright. This will be the body of your fridge.
Tip: A box from a fan, vacuum, or tall toy packaging works great.
✅ Step 2: Cut the Fridge Doors
Using a pencil and ruler, draw two doors:
- The top door is for the freezer
- The bottom door is for the refrigerator
Cut along three sides of each rectangle so the doors can open outward. Leave one side attached as the hinge.
✅ Step 3: Create Shelves Inside
Use leftover cardboard pieces to create 1–2 shelves inside the fridge.
- Cut the shelf pieces to size
- Use glue or tape to secure them to the sides inside
Want to be fancy? Add a small box at the bottom as a vegetable drawer!
✅ Step 4: Add Door Handles
Roll up small pieces of cardboard or use plastic bottle caps as handles.
Glue them onto the doors.
✅ Step 5: Decorate Your Fridge!
Now the fun part—decorate!
- Paint the outside white, silver, or your favorite color
- Add stickers, paper cut-outs, or even a “Fridge Notes” section
- Draw buttons or make a pretend water dispenser with paper
✅ Step 6: Add a Closure System (Optional)
Use magnets, Velcro dots, or tape to help keep the fridge doors closed during play.
🧊 Your Fridge is Ready!
You’ve now made a DIY cardboard refrigerator—perfect for any kids’ kitchen set! Add in some toy food, recycled containers, or homemade paper groceries, and your little chef is all set to cook up a storm!
🧒 Why This DIY Project is Great for Kids
- 🧠 Boosts Creativity: Kids design, build, and decorate their own appliance.
- 🖐️ Develops Fine Motor Skills: Cutting, gluing, and painting build coordination.
- 🗣️ Encourages Role Play: Great for storytelling and learning about home life.
- 🌱 Eco-Friendly: Reuses old materials in a smart, fun way.
🎥 Watch Pari Make Her Own Fridge!
Want to follow along? Watch Pari’s DIY fridge video and make one together at home!
💡 Extra Fun Ideas
- Add LED fairy lights inside for a glowing fridge look!
- Make cardboard ice trays or pretend ice cream for the freezer.
- Design a menu or shopping list for your kitchen setup.
🍎 Let’s Pretend, Play, and Learn!
With just a cardboard box and some creativity, your child can enjoy hours of fun with their own handmade fridge. It’s not just pretend play—it’s learning through building, decorating, and using their imagination.
Don’t forget to share your cardboard fridge with us!
📸 Tag your fridge creation with #LearnWithPari
Stay Creative. Stay Curious. Learn with Pari!


