Do you have old furniture lying around that looks tired or worn out? Instead of throwing it away, why not give it a fun makeover? At Learn With Pari, we believe in creativity, saving the planet, and making the most out of what you have. Repurposing and DIY furniture projects are a fantastic way to learn new skills, save money, and refresh your home environment!
Today, we’re sharing simple, kid-friendly ideas to turn old furniture into something fresh and exciting—plus some inspiring before and after photos!
🛠️ Why Repurpose Old Furniture?
- Eco-friendly: Reduces waste and keeps furniture out of landfills
- Budget-friendly: Saves money compared to buying new pieces
- Creative: Gives you a chance to customize and add personality
- Educational: Great project for kids to learn about painting, sanding, and crafting!
🧰 What You’ll Need for Your Furniture Makeover
Before you start, gather these basic supplies:
- Sandpaper or electric sander (for adults or supervised use)
- Primer and paint (chalk paint works great!)
- Paintbrushes and rollers
- Screwdriver (to remove handles or hardware)
- New knobs or handles (optional)
- Old cloth or rag
- Wood glue or filler (for fixing cracks)
- Stencils or stickers (for decoration)
🏗️ Step-by-Step DIY Furniture Makeover
1. Clean and Prepare
Wipe down the furniture thoroughly to remove dust and dirt. If there are any cracks or holes, fill them with wood filler and let it dry.
2. Remove Hardware
Take off handles, knobs, or any accessories. This helps you paint evenly and also lets you replace them with new ones later.
3. Sand the Surface
Lightly sand the surface to remove old paint or varnish. This helps the new paint stick better. Always have an adult help with sanding tools.
4. Prime the Furniture
Apply a primer coat to seal the surface and improve paint adhesion. Let it dry completely.
5. Paint Your Furniture
Choose fun colors! Chalk paint is popular because it’s easy to use and gives a smooth finish. Use multiple thin coats for best results.
6. Add Details
Use stencils, stickers, or freehand designs to add a personal touch. You can also add new knobs or handles to update the look.
7. Seal and Protect
If the furniture will be used often, apply a clear sealant to protect your work.
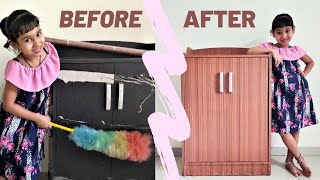
🎨 Before and After: Inspiring Transformations
Here are some amazing transformations you can do:
- Old wooden chair → Colorful reading nook seat
- Worn-out dresser → Chic storage with bright paint and new knobs
- Rusty metal table → Industrial-style craft table with fresh paint
- Plain bookshelf → Fun, patterned shelf with stencil designs
🧒 Make It a Family Project!
Get kids involved by letting them choose colors, paint simple sections, or add stickers. It’s a wonderful way to encourage creativity and teamwork.
🌟 Extra Tips for Success
- Always work in a well-ventilated area
- Protect floors and surfaces with old newspapers or cloth
- Be patient—let each coat dry completely before the next
- Have fun and don’t worry about perfection—each piece is unique!
📺 Watch Pari’s Furniture Makeover Video!
Want to see these steps in action? Check out Pari’s DIY furniture makeover videos on our website and YouTube channel!
♻️ Repurpose, Reuse, and Refresh!
Turning old furniture into something new is a rewarding way to learn, reduce waste, and add charm to your home. So next time you see an old chair or table, think “makeover” instead of “throw away.”
Let’s get creative and make the old look new again—with Learn With Pari!

